IP Configuration
NoteTo assign an IP address, you do not need to open CAM-Pro programs once the control board is connected to the computer.
To assign an IP address, follow the steps below in order.
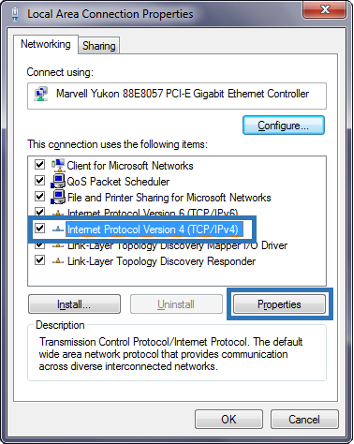
First, go to the Start menu in Windows, then enter the Control Panel, and follow the steps shown in Figures 33 to 40.


Click on Internet Protocol Version 4 (TCP/IPv4) to highlight it in blue, then click on the Properties button (Figure 38).
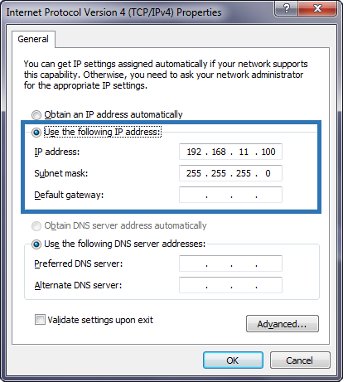
Select Use the following IP address, then enter the IP address to be used by the control board:
IP Address: 192.168.11.100
Subnet Mask: 255.255.255.0
Click OK (Figure 39), then close all open windows.
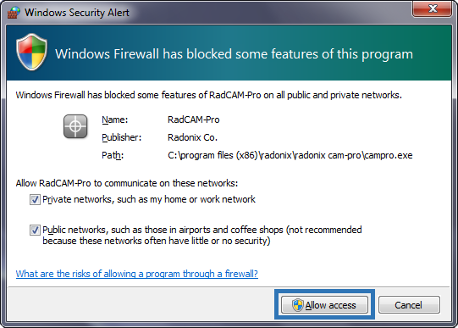
After the IP is assigned, when you run any CAM-Pro program (CAM-Pro, CAM-Pro Test, or CAM-Pro Calibrator), a Windows Firewall prompt will likely appear, asking whether to allow the connection. Check both boxes and click Allow access (Figure 40).
NoteIf you do not check both 'Private networks, such as my home or work network' and the second box in Figure 40, and if the IP is blocked by the firewall—or if an antivirus program prevents the connection between the control board and the computer—follow the steps in Figures 41 through 49.


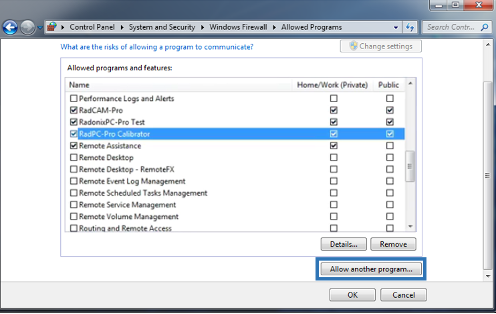
If software options appear grayed out in the Allow a program or feature through Windows Firewall window, you cannot make changes. In that case, click Change settings as shown in Figure 45. If programs are already editable (in black), you can skip this step.
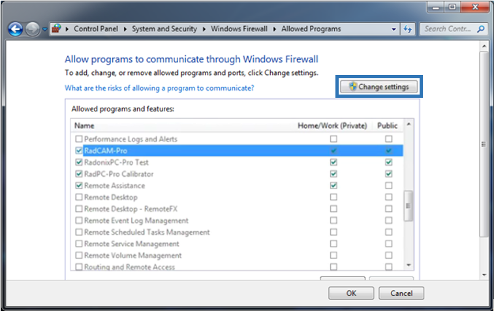
If Radonix programs (RadCAM-Pro, RadonixPC-Pro Test, RadPC-Pro Calibrator) are not listed under Allowed programs and features, follow steps in Figures 46 through 48. If they are already listed, you can skip those steps.
In Figure 47, use the Browse button to locate and add Radonix files.


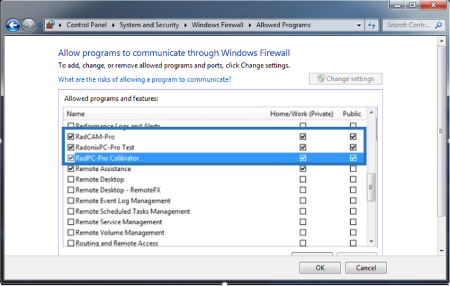
According to Figure 49, ensure all checkboxes are selected. If any are not checked, click them to enable access.
You can now run Radonix software successfully.
NoteIf the connection between the control board and the computer is properly established, and the power supply is active, the LEDs on the LAN connector of the control board will blink or remain lit.
If the LEDs are not lit, this may indicate a broken cable connection or a problem with the connector.