General Introduction to Interfaces
Once the software and the appropriate interface are installed, you can now begin using the Radonix software. This section provides an overview of all elements used within the software.
First, double-click the Radonix file. As shown in Figure 6, you will see a list of all installed interfaces.
If multiple interfaces are installed on the computer, right-clicking on any interface opens a menu. From this menu, you can enable, disable, or completely uninstall an interface.

Options available in the interface control menu:
- Active Interfaces
- Reactivate Interface
- Disable Interface (the title of the interface will appear dimmed)
- Completely Remove Interface from the Computer
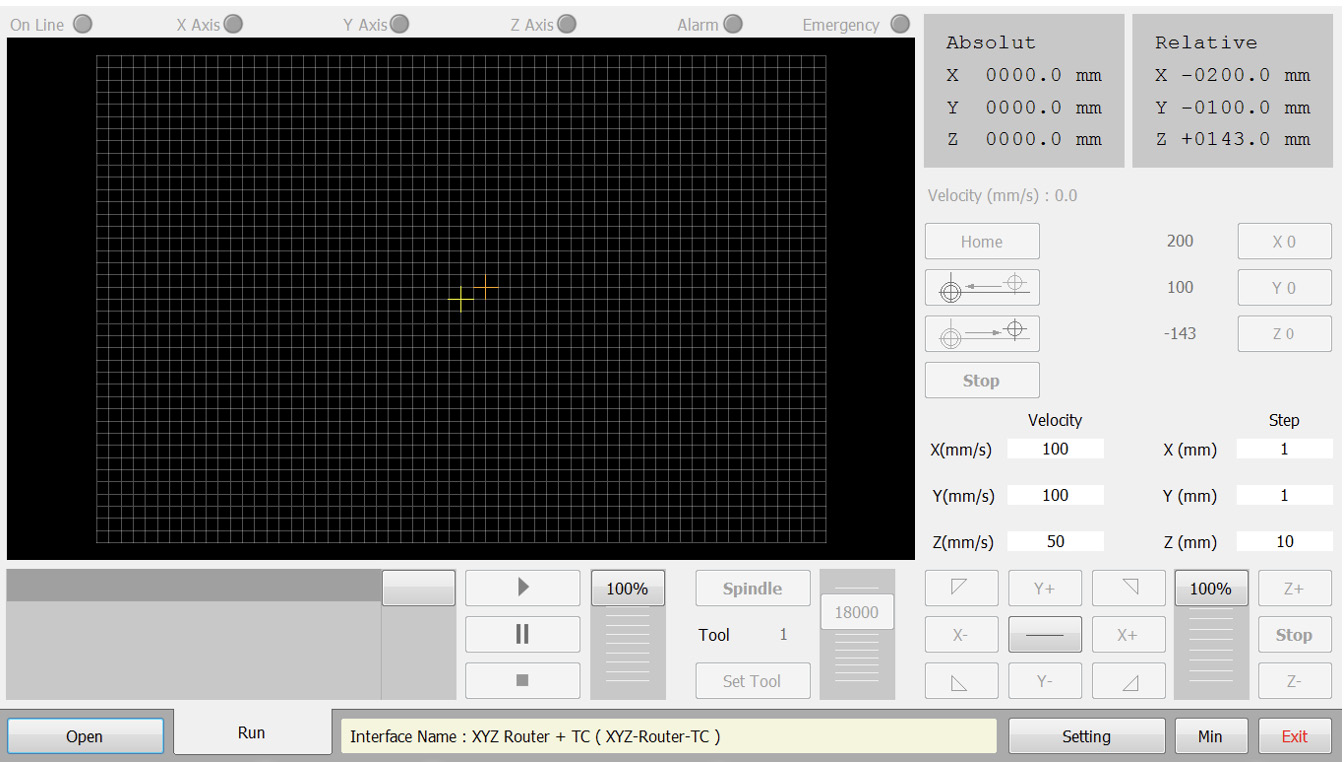
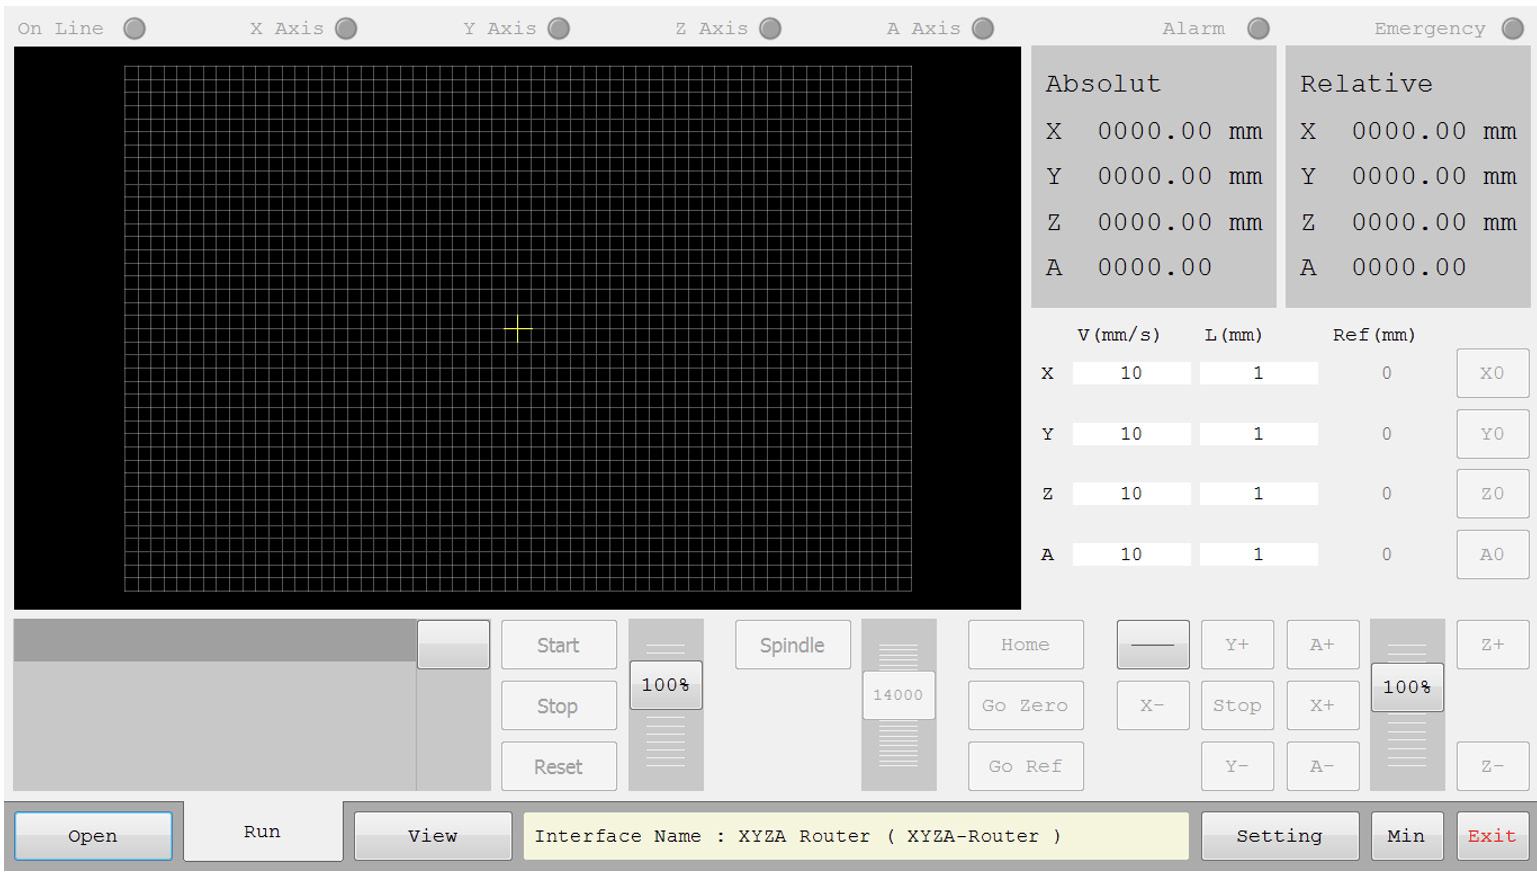
By left-clicking on any interface, it will open within the software. Figures 7 and 8 show examples of two different interfaces. Each one includes different icons depending on its features.
For instance:
- In Figure 7, the interface includes X, Y, and Z axes along with a tool change capability.
- In Figure 8, the interface includes X, Y, Z, and A axes, but does not support tool change. Only the A-axis control icons are present, and the tool change section has been removed from this interface.
This allows users to clearly see the differences between various interface capabilities.